180SX Rally Car Engine Bay
This is the first opportunity I have had to update the build thread for several weeks. With the amount of work required to prepare a new car and team to tackle the largest rally in the WA calendar, the blog has had to wait until after the Forest Rally for an update. I’ll cover how the car went at its debut event(s) in a future post.
Back to the build thread.
Our attention turned to the engine bay and external items as soon as the interior was completed.
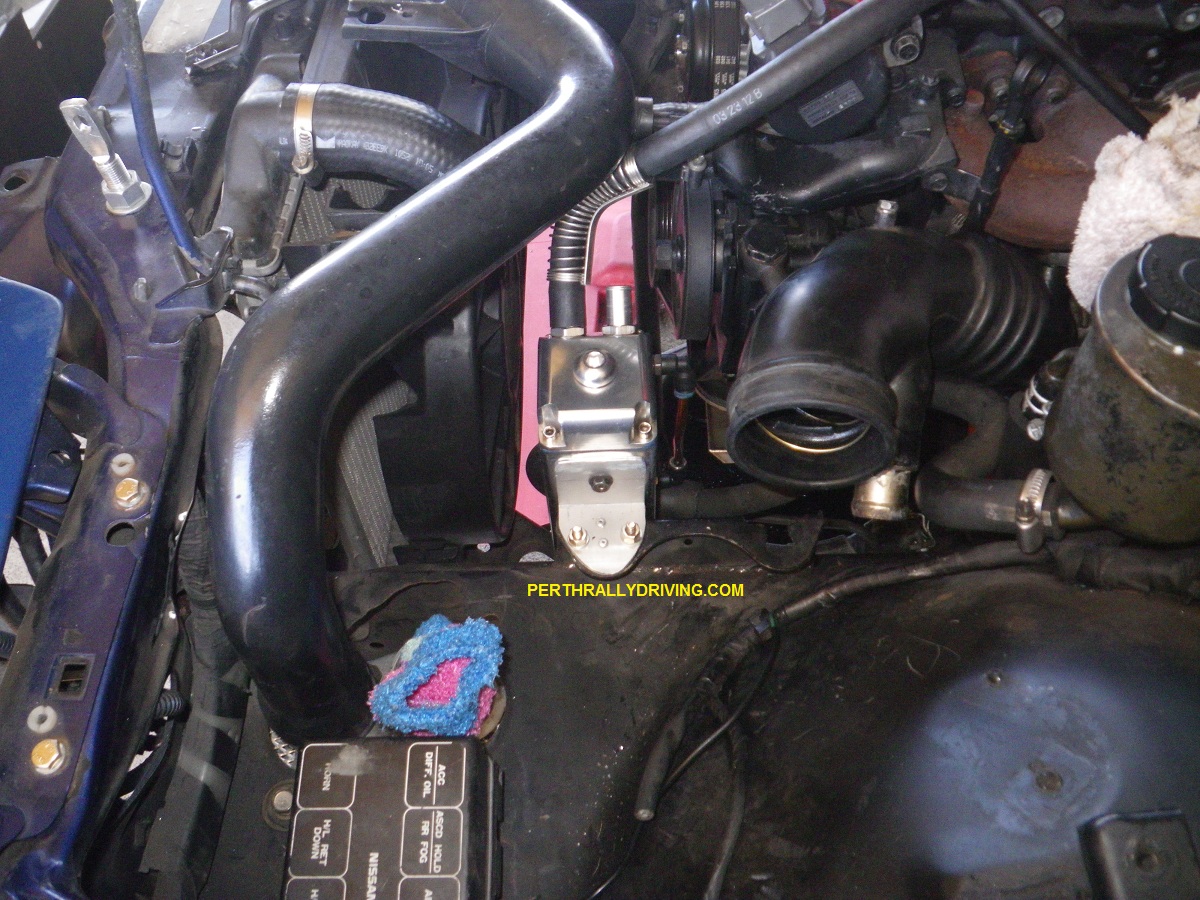
The boost plumbing was first on the list and the unsightly rubber hoses and multiple Tee pieces we’d inheritted with the car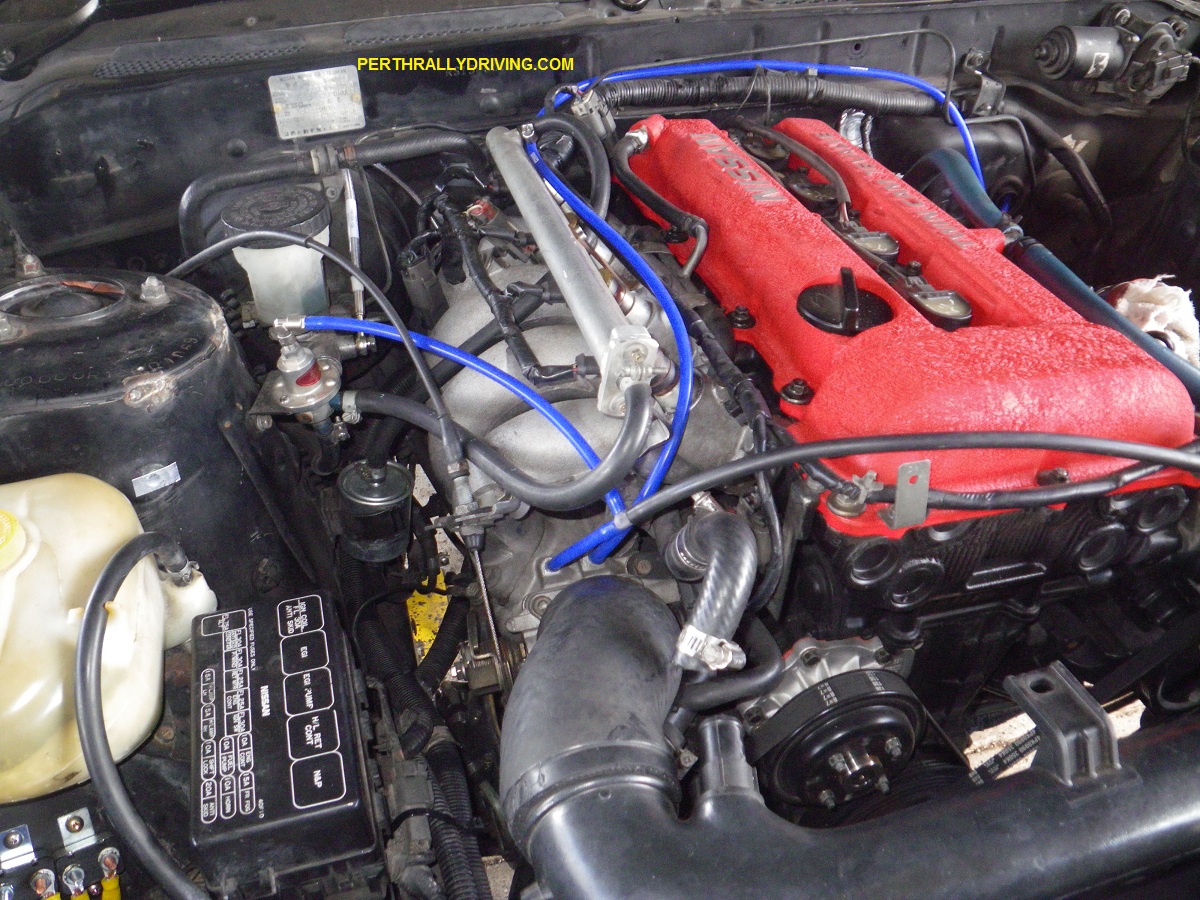 were removed. We fitted new silicone hoses and simplified the plumbing to ensure everything will work properly. We also re-addressed the intercooler set up. Initially we had the CA intercooler fitted and were planning to run an aftermarket BOV in the engine bay.
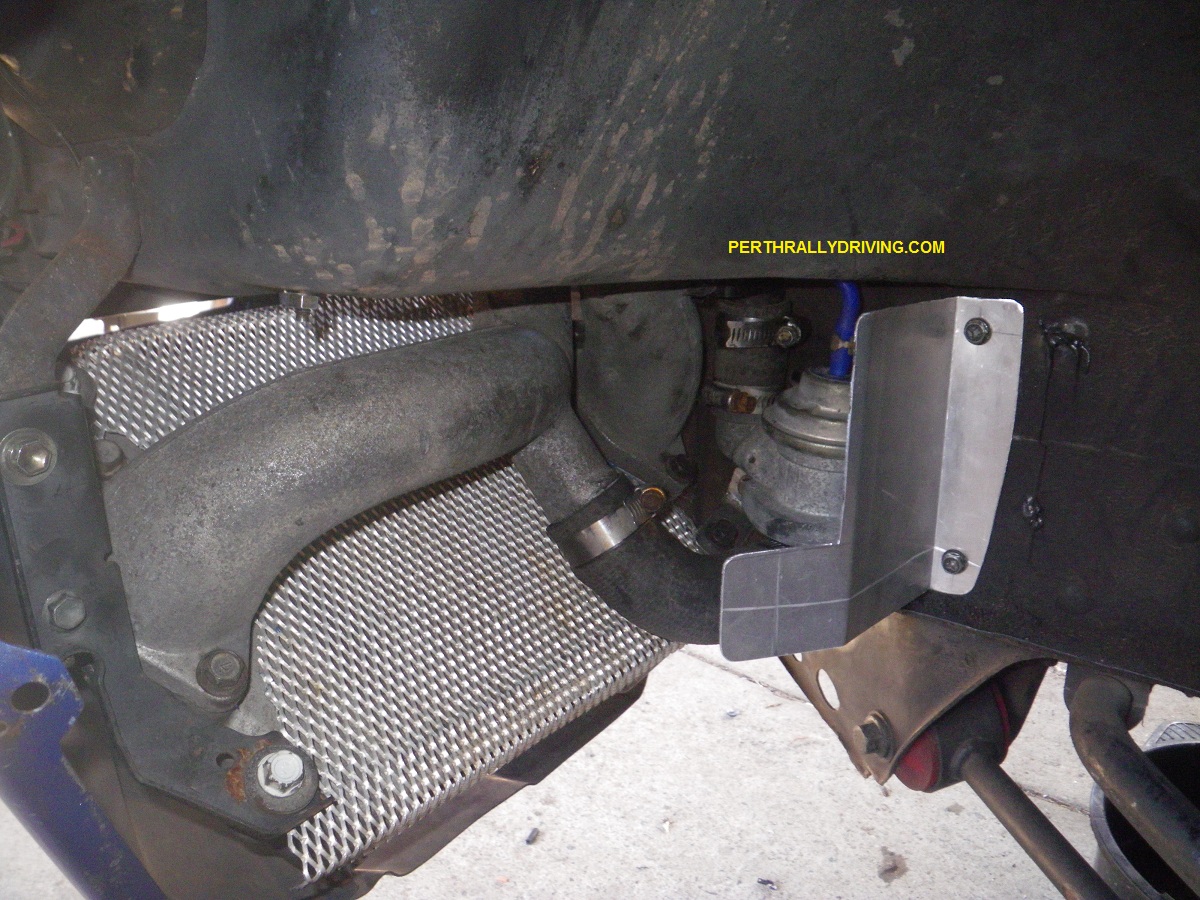 With limited space and the factory intercooler pipes sourced (finally), we realised that we’d be better off with the SR intercooler and standard BOV which all sit in front of the LHS wheel arch. An alloy guard was fabricated for the BOV and bolted into place with the SR intercooler and hoses. We fitted the rest of the parts and worked out what space we had before connecting all the pipes up.
With no Air Flow meter in this rally car, we were free to use a Pod filter and didn’t need to plumb back the BOV into the intake. Instead we fitted a small breather filter to the outlet pipe on the BOV to prevent dust from entering and to allow excess boost to be dumped to atmosphere.
 For a while we had wondered what to do with the oil catch can we received with the car. With a strut tower brace and remote canister suspension on the cards, fitting the catch can near the firewall was not going to be a possibility. We found space on the LHS chassis rail just in front of the engine to mount the can and plumbed everything in correctly. This position allowed us to keep the pipes away from the heat of the turbo too. Speaking of heat, when we got the car, the turbo/manifold heat shield was missing. Knowing how much heat is generated during competition, we bent up a simple aluminium heat shield for the exhaust manifold and
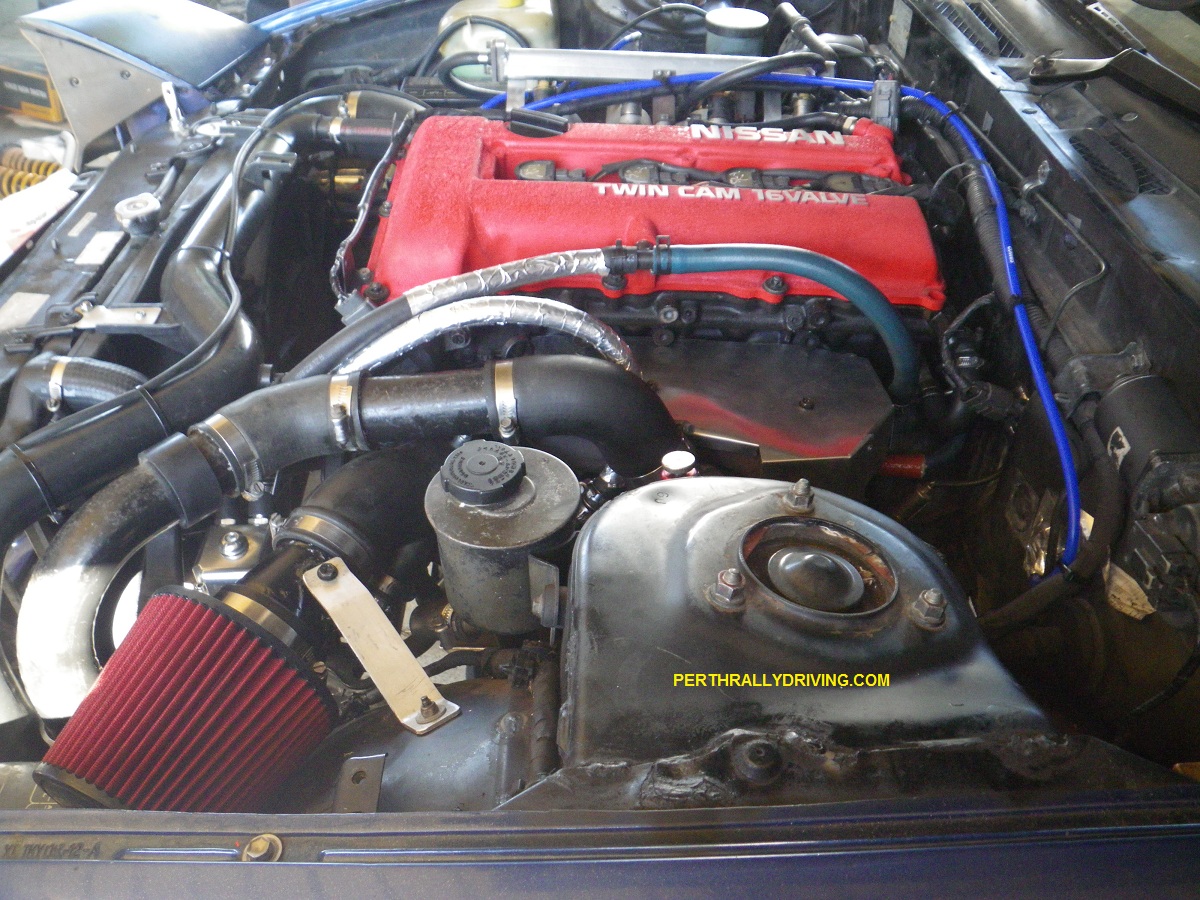 bolted it to the existing threads. We were also given the tip that the Factory igniter does not cope well with heat and produces a misfire once hot. Another small alloy heat shield over the igniter was made up to protect the crucial ignition component.
Most of the breather hoses were replaced with the correct type, size and length pipes before everything was checked. The breather hoses running close to the manifold were also wrapped with foil tape to provide extra heat protection. With everything in place, connected and clamped, the turbo plumbing was completed and finished off with a K&N pod filter.
On the right side of the engine, we replaced all the well perished fuel hoses on the injection rail, Sard fuel pressure regulator and fuel filter before testing to ensure of no fuel leaks. 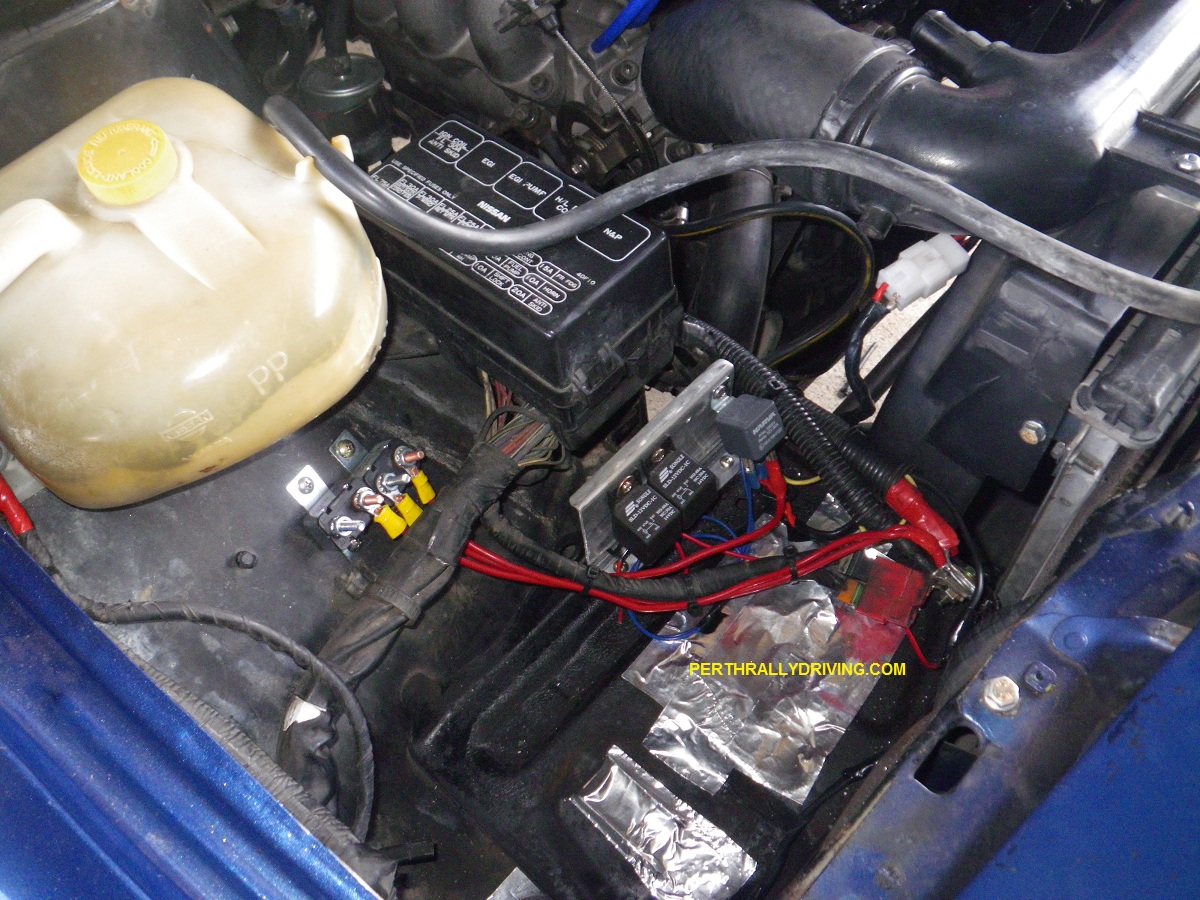 Where the battery once resided, a small alloy bracket to mount relays was bent up and fixed into place. During the interior work, wiring was pre-cabled for the thermo fans and spot lights so we just had to fit the relays and terminate the wiring.
Before turning to the brakes & suspension, three last items were completed. The engine was serviced and the gearbox oil replaced. Also, we sourced a strut tower brace, gave it a light sand and a quick coat of paint to tidy it up.
Next Post will detail the brakes and suspension.
More build articles here
