Excel Build part 7- Roof vent, bonnet pins & interior
With the start of our Rally Experiences, a Club Motorkhana car to complete and compete in and replacing an engine in our customer’s 180SX rally car, the X3 had taken a back seat for a couple of weeks.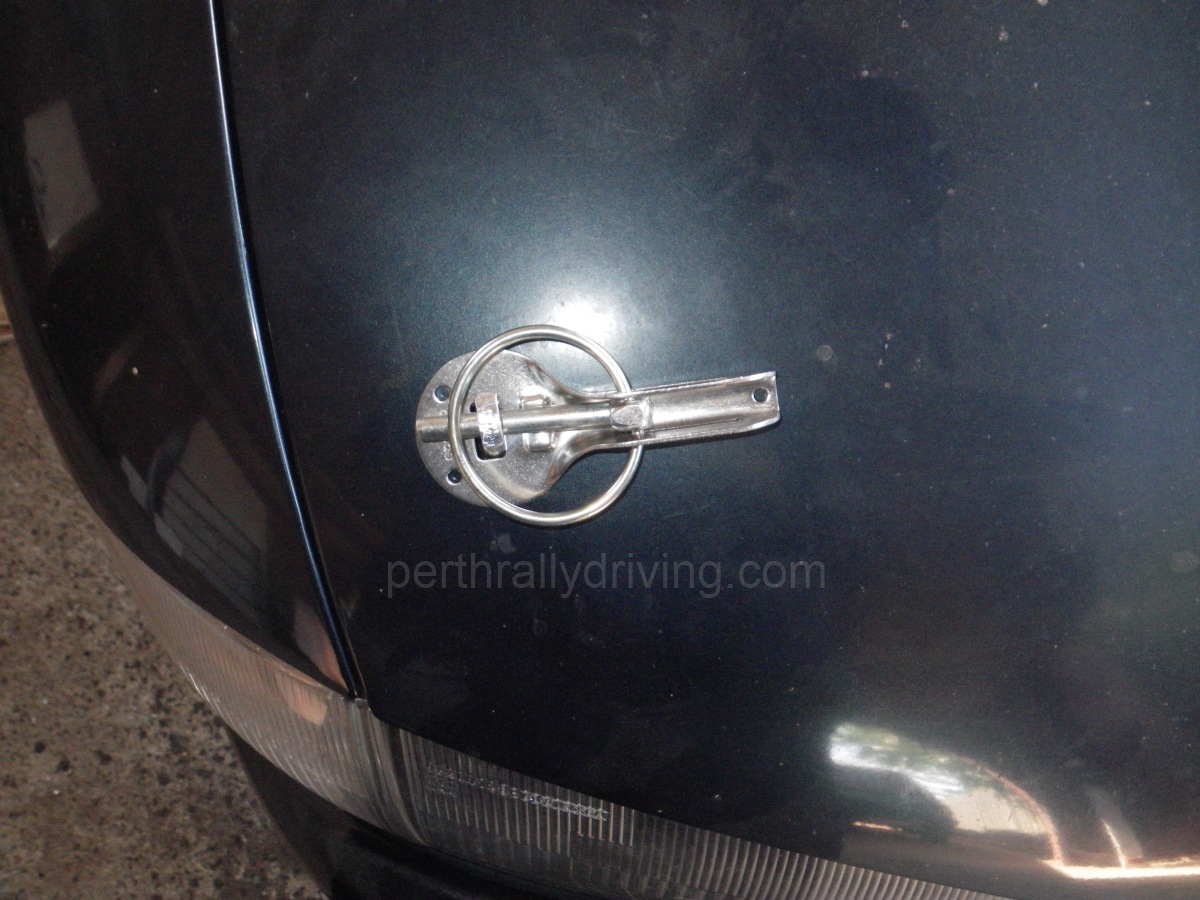
With a coat of paint scheduled ASAP, exterior fittings were the first to be tackled. Bonnet pins are a necessary item and so the bonnet was drilled and the pins mounted. There’s a couple of tricks to fitting bonnet pins. We used factory holes already drilled in the top radiator support panel to bolt the pins into. With the pins in place, the bonnet was then closed slowly to mark the inside position of the holes. A small pilot hole was then drilled through from the underside of the bonnet. The final drill is done from the top of the bonnet (use progressively larger drill bits or a step drill) and the pins are adjusted to make sure the clearances are correct. The clips will be drilled and fixed once the car is painted.
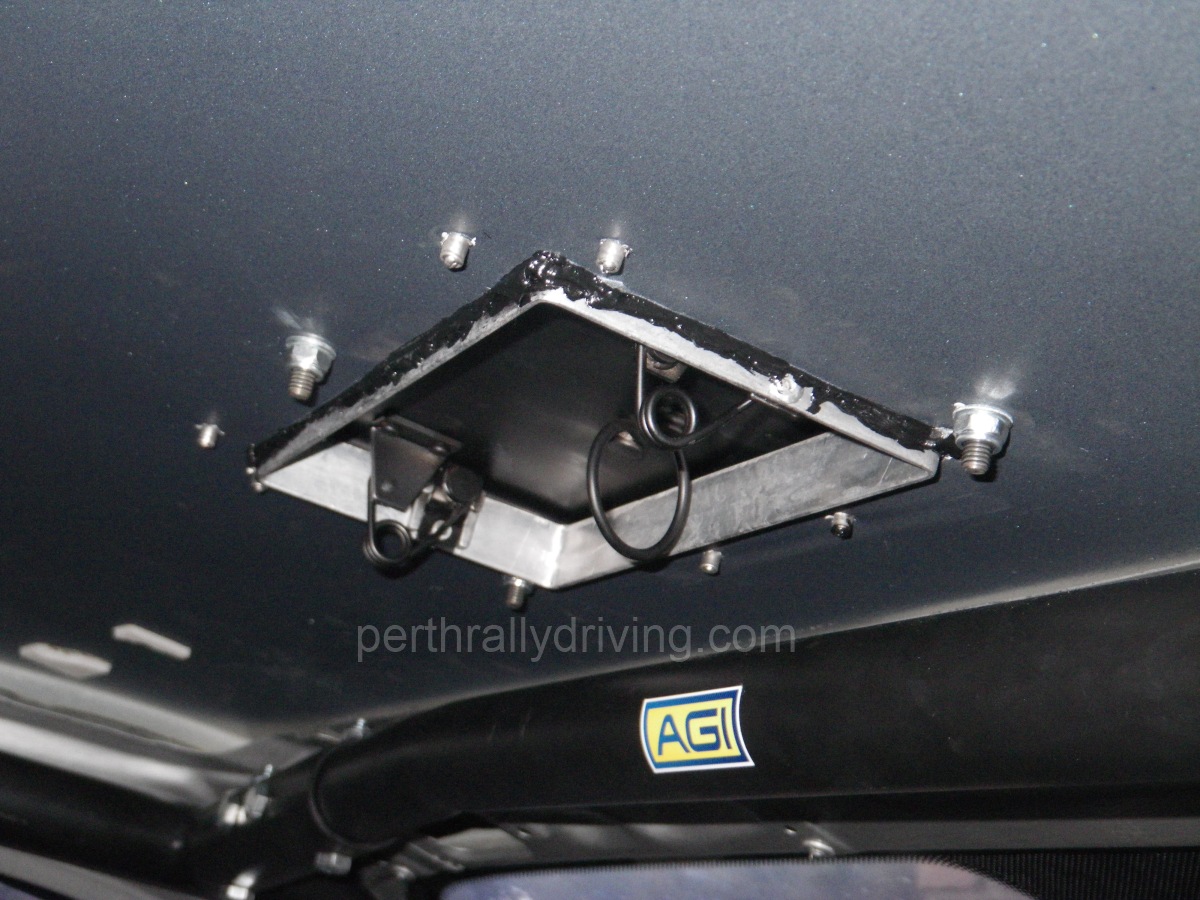
Whilst working on the exterior, the roof vent was fitted. The roof was measured and marked for the best position. Every car is different so the position will depend on the roof design, roll cage bars and ergonomics. Generally we try to get the roof vent as forward as possible. Why fit a roof vent? Well, without air conditioning and interior trims, competition cars become very hot inside, even when the weather is cool. Competitors are not permitted to race with the windows open (besides a great deal of dust would enter the cabin) so roof vents are fitted to provide cooling air. When a roof vent is open and the car is moving, the air inside the cabin becomes pressurised which keeps out dust and even rain if the car’s speed is fast enough.
 The biggest mistake most people make when fitting a roof vent is cutting out the hole. Using an angle grinder burns the paint around the cut and creates a lot of sparks. A jigsaw tends to buckle and twist the thin roof metal around the cut. The best way is to mark out the opening, drill four small holes in the corners with a sheet metal drill bit, then enlarge the holes carefully with a larger drill bit or step drill. Cutting the actual metal is then done with a nibbler. Even working carefully and slowly with a nibbler will only take a few minutes to cut the hole out. If the roof is not being painted, using masking tape around the outside of the opening will help prevent scratches to the surrounding paint. On the inside, a plastic bag or sheet of newspaper taped to the roof around the opening will catch the drill and cutting swarf which aids in clean up, especially if the interior is fitted out.
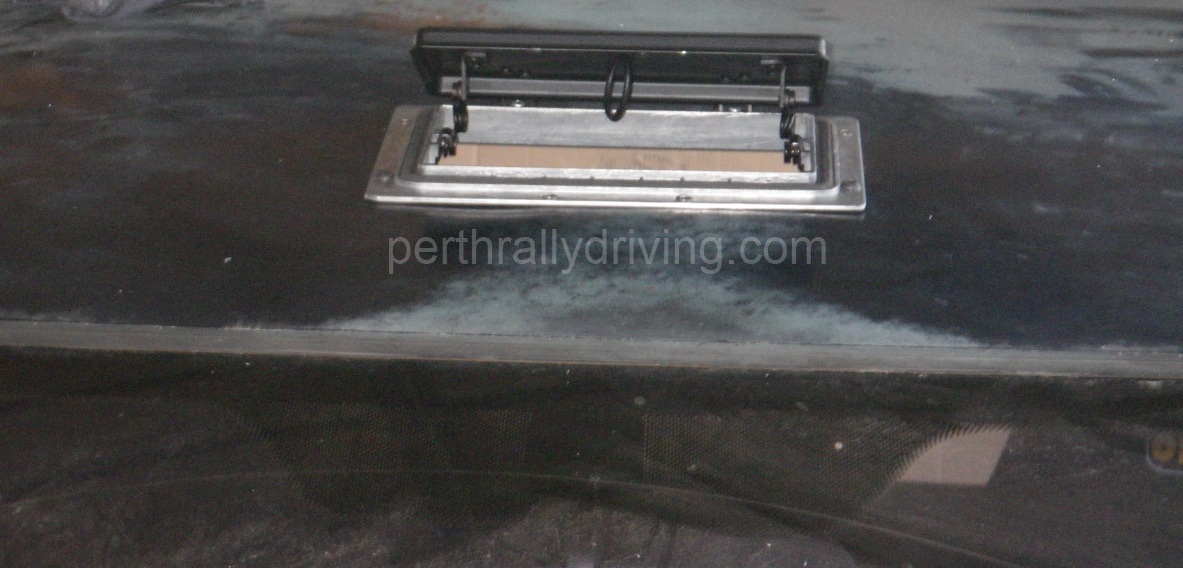
Once the hole was cut, the vent was sat in position to check. The holes for the fixings were then marked and drilled. Before we fixed the vent, a good bead of sealant was applied round the opening to make a water tight seal. Vents can be fixed with bolts or rivets, depending on the car and vent.
 The interior was nearly complete, save for the rally computer, intercom and navigator’s foot rest. We’d previously made up the mounting bracket to fit the Monit rally computer and it was just a matter of fixing it to the dash, drilling a hole for wiring and then wiring up the computer. Having tested this brand of computer, we now recommend and fit Monit G100 (GPS) computers to all rally cars we build. Depending on the car, we often fit a separate fuse box on the dash to house auxillary fuses such as map reading light, intercom and rally computer. The Excel is fitted with a 9V battery powered intercom and no map reading light (at this stage) so we simply used the wiring from the OEM interior light for the rally computer. A GPS rally computer realistically only needs a power, an earth wire and an aerial to be operational. Extra wiring is only required for accessories such as a remote zero or an optional wheel probe. This makes these rally computers very easy to fit.
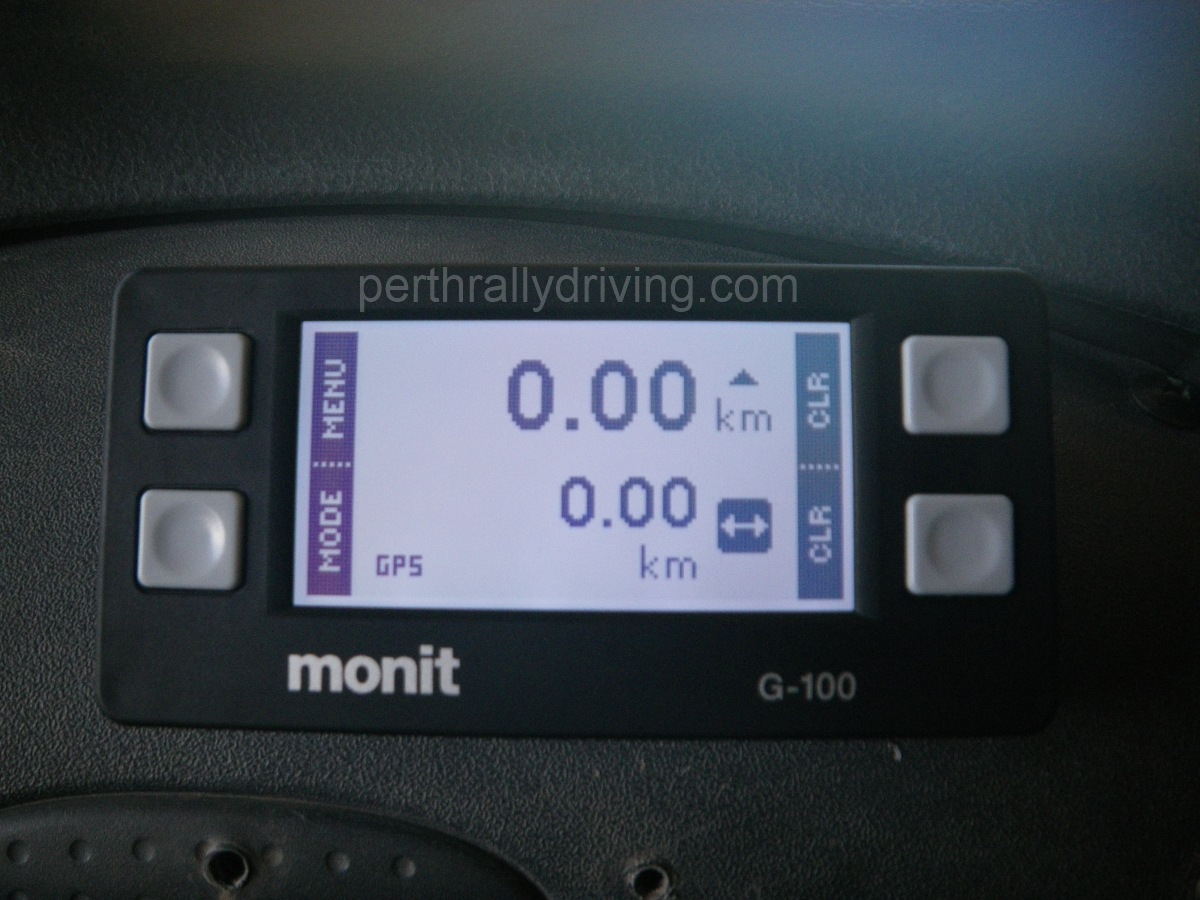
We made the navigators foot rest out of 3mm aluminium checker plate that was trimmed to fit the shape of the foot well and brackets were then cut and 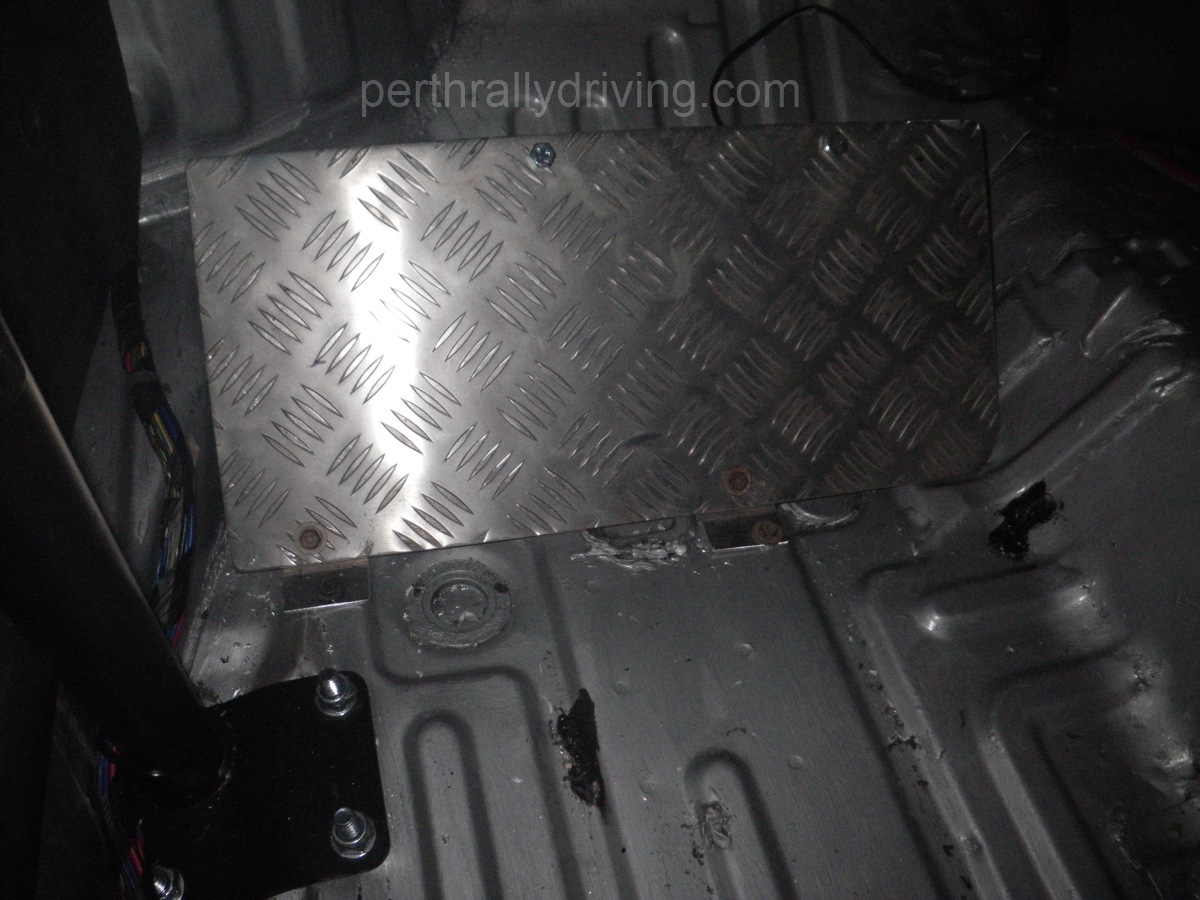 bent to fix the plate at the correct angle and then bolted through the floor. The foot rest serves not only to keep the navigator’s knees bent to rest the pace notes on, it also provides a brace to help keep the passenger comfortable in the seat during stages. The customer also requested a foot actuated reset button for the rally computer (some competitors prefer a hand held reset button). The reset button is used to zero the intermediate distance counter on the Monit. The button was drilled and mounted in the top right corner of the plate and the wiring connected.
Our last item in the front of the car was to raise the gear shifter. As standard the cable gear shift is quite low and not overly direct. The easiest solution was to cut 25mm 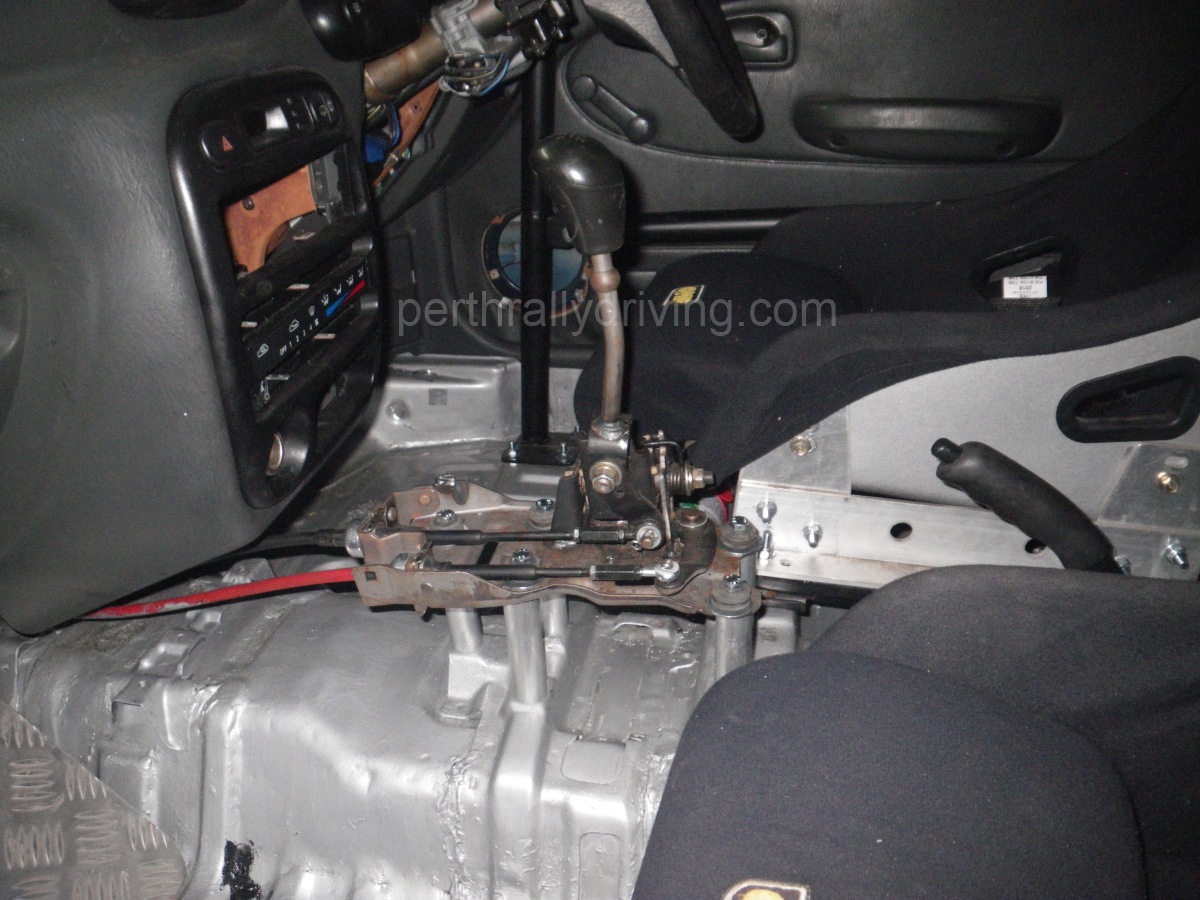 aluminium tubes to 100mm lengths, lift the shifter up and use long bolts to hold it all into place. Raising the shifter and removing the rubber bushes on the mounting plate means the driver doesn’t have to reach down so far for gear changes and the shift has a better feel. We did look at cutting and welding to make a “quick shifter” however with a standard gearbox, such a mod is just likely to over-speed the synchros and cause damage.
The next post will cover completion of the exterior and suspension fitting.
