Excel Build part 8- Exterior, suspension and brakes
What an insane couple of months it’s been! Rallies have been coming thick and fast with just three to four weeks between events. We have no sooner un-packed everything from the last event, we’re turning the cars round and packing for the next event. We’ve been so flat out, since the last post on the build, the Excel has already competed in two rallies!
For many owners, it’s not the engine, the brakes or the safety that is the number one thought when building a car. It’s the colour.

This build was no exception. For many weeks both before and during the build, the colour scheme presented the largest discussion with the owners. In the end we were requested to paint the car “GT Falcon Orange”.
With some research we found that GT Falcon Orange is actually Ford Blood Orange, a non metallic colour that adorned some of the BA/BF series GT Falcons.
Typical of many cars on the roads, the original paint work had suffered under the sun. Previous neglect to wash and polish coupled with a dark colour had ruined the clear coat and underlying paint on most of the flat surfaces of the car. The tops of the front and rear bumpers had also got to the point that the plastic had melted and bubbled from UV exposure.
With the purpose of the car in mind and the budget, the damaged paint areas were all sanded back to give a flat surface. The bumpers were taken back as flat as we could get them and the whole car was blocked back ready for a coat of paint. We either

removed peripheral items such as lights, wipers and mirrors or masked them up along with the windows. The packaging material from the roll cage also came in handy. We cut the packing to the correct shapes to suit the glass areas on the car and taped into position. It saved on a lot of paper and tape.
A good wipe over with wax and grease remover and then a dry wipe with clean rags saw the car ready to spray.
At the same time, the owners had supplied us with new 14” alloy wheels so they were also prepped for painting.
To see how well the orange would cover over the dark blue, the spoiler was sprayed first. The coverage was good and so the wheels and then the car were sprayed. In three or so hours the whole job was completed.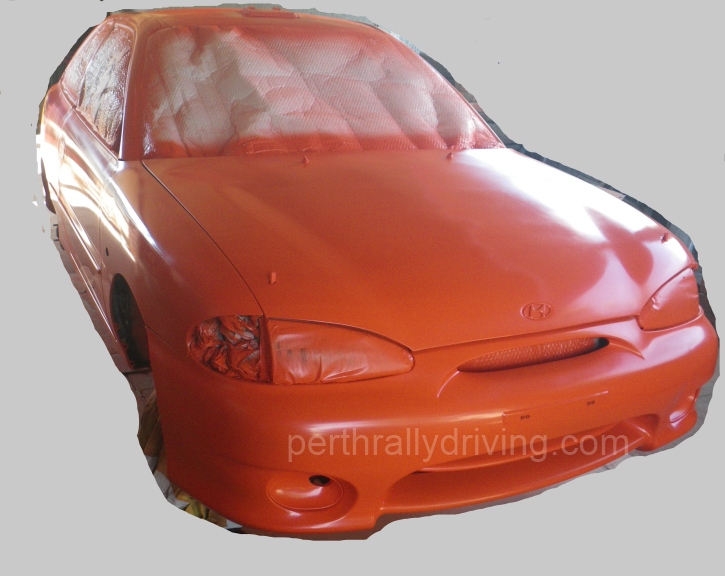
After leaving the paint to cure for a day or so, the masking was removed and the ancillary items re-fitted. Rally tyres (in this case D-Mack) were rolled onto the new wheels ready to be fitted.
When we start the build of any rally car one of the first items on the agenda after the roll cage is the suspension. Like any part of a competition car build, the cost is a factor. We always recommend fitting the best suspension that the budget allows. Good quality suspension will provide a huge handling advantage and be more robust to cope with the rigours of rallying. For the X3 we researched STD suspension which we’ve had good success with in other cars. STD notified us that they don’t produce suspension for an Excel, whether it be for road or competition use. Initially the cost of MCA or DMS suspension didn’t fit with the budget so we looked into other options. K-Sport looked like a possibility as well as some older Hotbits (Noltec) suspension. In the end, we found a brand new set of DMS that an Eastern States supplier had ordered in and then the client cancelled the order.
We got the full set for what seemed like a great deal on the surface and the payment was made. In the end dealing with this particular supplier left a very sour taste. From the time of payment it took weeks to receive the suspension. Many poor excuses were given and then once we received it, an invoice followed for freight even thought the original price was to include freight. When un-boxed when found that several of the special camber washers were missing and despite numerous phone calls and emails to the supplier, in the end we had to purchase new items directly from DMS. It was an example of very bad customer service and we do wonder how someone like that is able to stay in business.
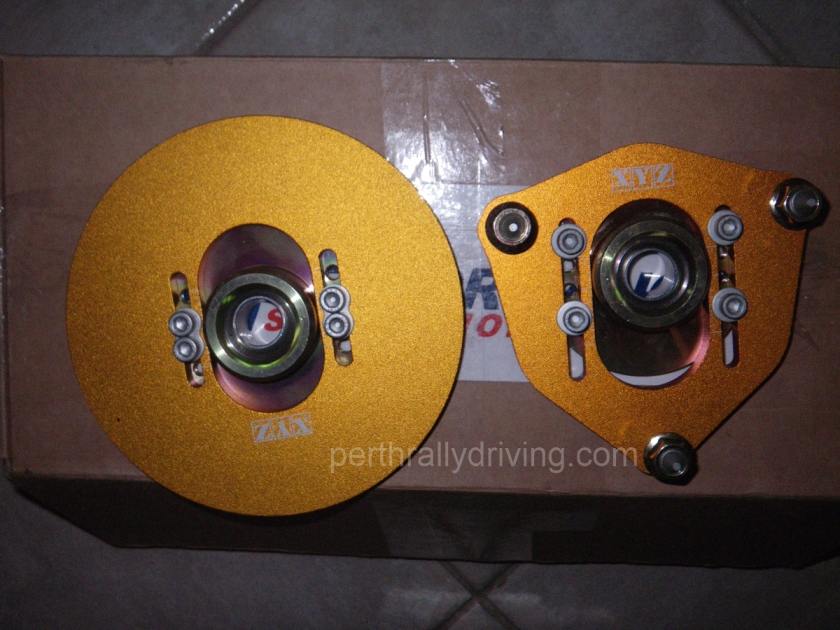 The positive is that DMS is very good equipment and will serve the owners well for a long time to come. To make the suspension work properly good quality strut tops were required. The factory rubber tops have enough trouble with normal road use so some research put us onto XYZ racing who produce camber adjustable billet blanks. Once ordered and delivered (in record time with exceptional customer service), we used the factory tops as templates and machined the new blanks to suit. As part of the price, the blanks are supplied with your choice of studs and retaining nuts to suit the shaft of the suspension you are using.
When we went to assemble the tops to the suspension we ran into a slight hiccup. The thread length on the end of the DMS shaft was not long enough to go through the supplied spacer and spherical bearing in the top. After some head scratching, it was decided that a small turning job on the spacer and retaining nut would allow plenty of thread to hold everything together properly and within spec.
Fitting was no major hassle, however the rear strut tops required some more lateral thinking. Due to the design of the rear top mounts, there is only a small hole to the inside of the car for the centre nut. Certainly not big enough to gain access to the camber adjustment bolts. To avoid cutting holes through the top mounts, the supplied cup head adjuster bolts were replaced with lower profile button head bolts and the cambers pre-set before the struts were bolted in. If further camber adjustment is required, it will mean dropping the struts down low enough to loosen the bolts on the strut tops. The last issue to fitting the rear struts was the factory sway bar. The clearance between strut and sway bar is very close with OEM parts so any larger struts foul. The simple solution is to remove the sway bar altogether. The car handles well without the sway bar anyway, a testament to the quality of the suspension.
Whilst under the back of the car, the rear arms were all removed and plated to strengthen them up. From the factory, the arms are simple “c’ section pressings that are known weak point when rallying.
Fitting the front strut was an altogether easier exercise. Basically bolt in. The only minor issue we encountered with fitting the DMS was the lack of brake line retainers. Without any way to secure the brake lines it wouldn’t take long for the lines to rub through against the struts. We used some spare hose to make sleeves and cable tied the lines into position.
Brakes were another issue we discussed early on in the build. It was decided the factory brakes would be retained in the car with future options to upgrade. A new set of front rotors and metallic pads found their way up front and the standard drums and brake shoes were inspected and found adequate at the rear. The factory cable hand brake has also been retained. Should the time come when the owners are outpacing the brakes, we’ll look at fitting rear disc brakes and larger front units. With two rallies down the brake decision has proved the right one.
The next post will cover final prep including suspension set up, sign writing and the all important first event.
