Nissan 180SX Rally Car- Spare wheel mount, boot latches and cage install
With the new front legs for the cage still on their way from the East, we got stuck into more items on the list.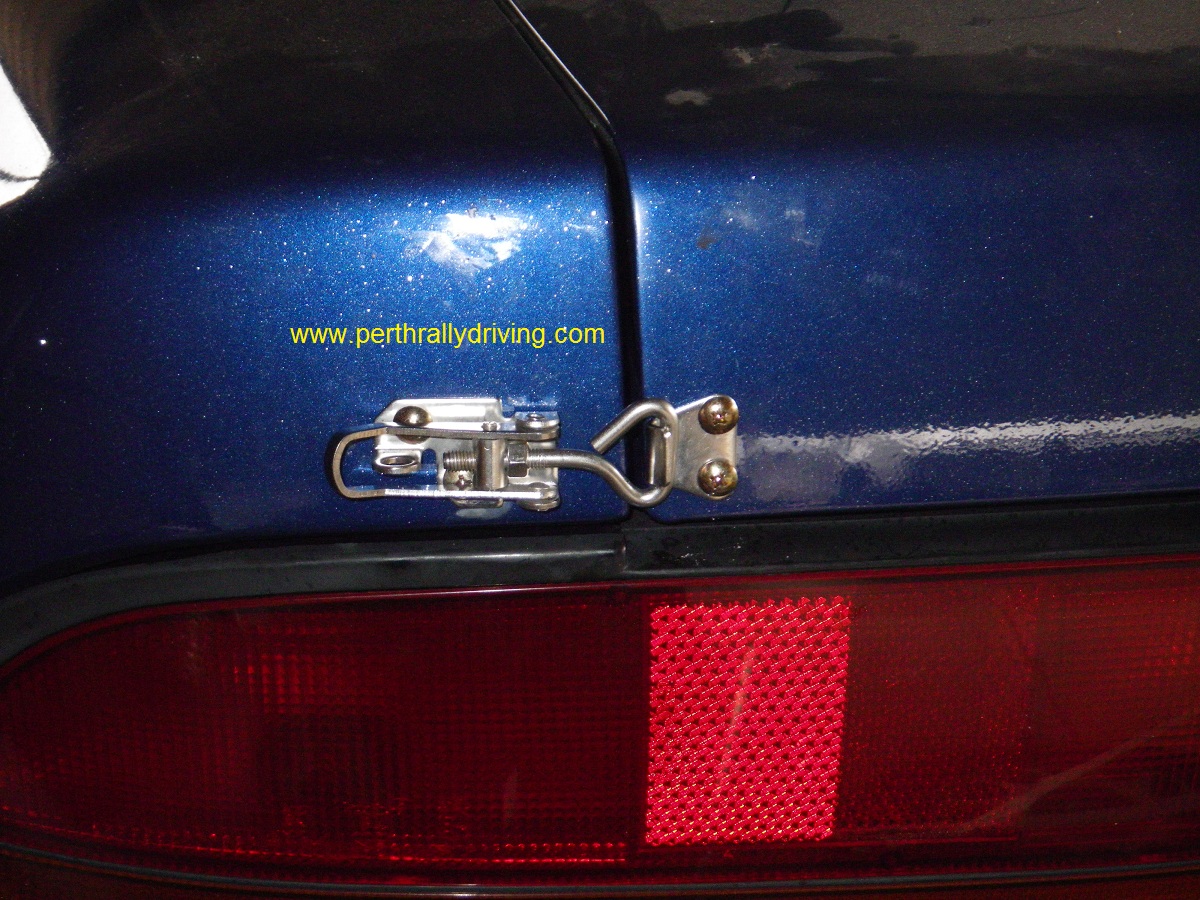
First up the rear hatch was fitted with some new latches. This allowed the removal of the hatch lock mechanism and cable (which also opens the fuel flap on the 180SX). In the process the rear wiper was also removed saving about 2kg of weight in total. Thankfully the gas struts work well on the hatch on this car and we don’t need to add a set of new struts to the list as well.
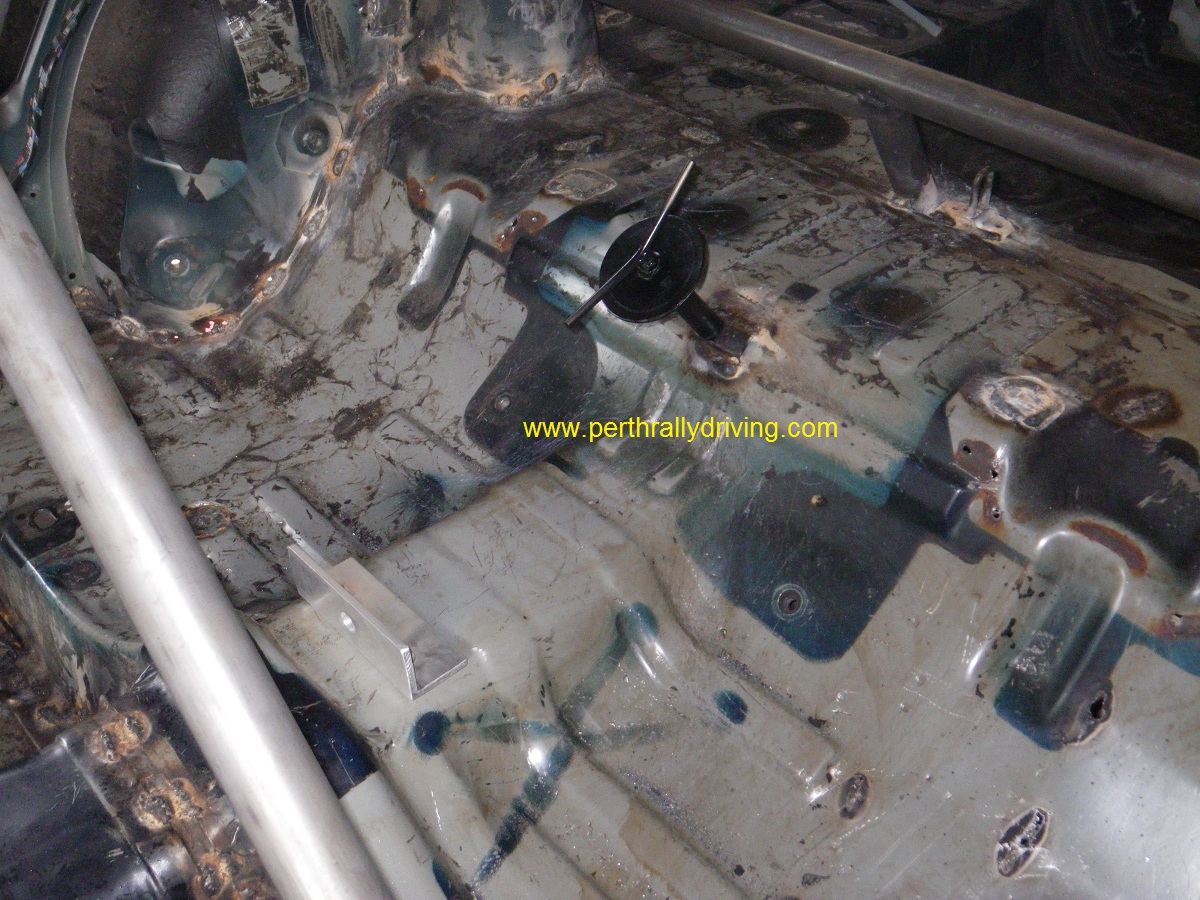 Next we tackled the spare wheel mount. Before we started the work, we had a lengthy chat with the owner. For ease of access, we had initially intended to install the spare wheel into the boot area of the car. This is not the ideal weight balance, however it would make it faster to get the spare out of the car if needed on a rally stage. Instead the owner chose the performance route. This meant mounting the spare wheel in the rear seat area. We had to carefully take measurements and check the position. We welded in a steel plate with captive nut and made up a suitable threaded clamp. A secondary restraint is also required so we bolted a heavy section of aluminium angle to the trans tunnel in front of the spare and welded an anchor point behind the spare wheel bar/strut tower brace. A ratchet strap will be used over the spare wheel between these two points to hold it in place.
The next task was to make up a panel to mount switches and the battery isolator. The standard opening in the 180SX where the radio would normally sit was  measured and a panel made of 2mm aluminium was cut to shape and drilled. We are often asked why we don’t polish the aluminium panels, brackets and mounts we make up. After all, most off the shelf “bling” is either polished or anodised. There’s two simple answers: 1.) Polishing takes more time and therefore costs more. 2.) More importantly the last thing you need in a competition car is reflective surfaces. Light reflecting into the driver and/or navigators eyes is a un-needed distraction. Following this theme, a mat will be used on the top of the dash and the pop up headlight panels will be painted mat black to eliminate glare.
Another alloy panel will be made up in the opening where the factory heater vents were situated and this will be used to mount gauges.
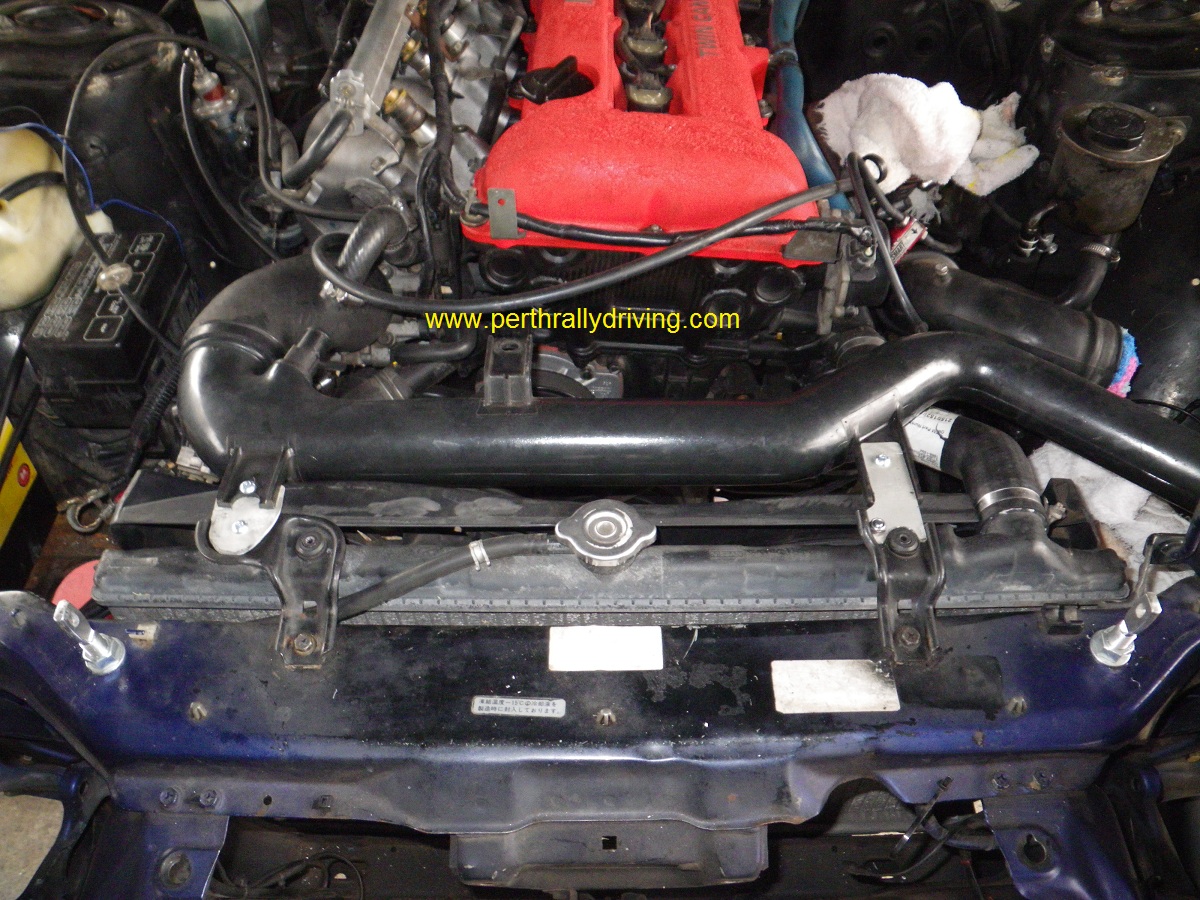 Under the bonnet small alloy brackets were made up to get the factory intercooler – throttle body pipe into the correct place. These were fixed to the factory radiator brackets using neat Allen key bolts with lock nuts. We are still searching for a standard “hot” pipe from the Turbo to the factory intercooler, so if you know of anyone who has one they’re not using, please contact us.
Mid week the new front legs arrived and we could get stuck into the cage install. This time, the manufacturer had made the legs much longer than required and sent the front mounting plates separately so we could cut to the correct length ourselves. After some measuring and adjusting to suit, the front leg plates were temp bolted into the car and the front legs tacked in position.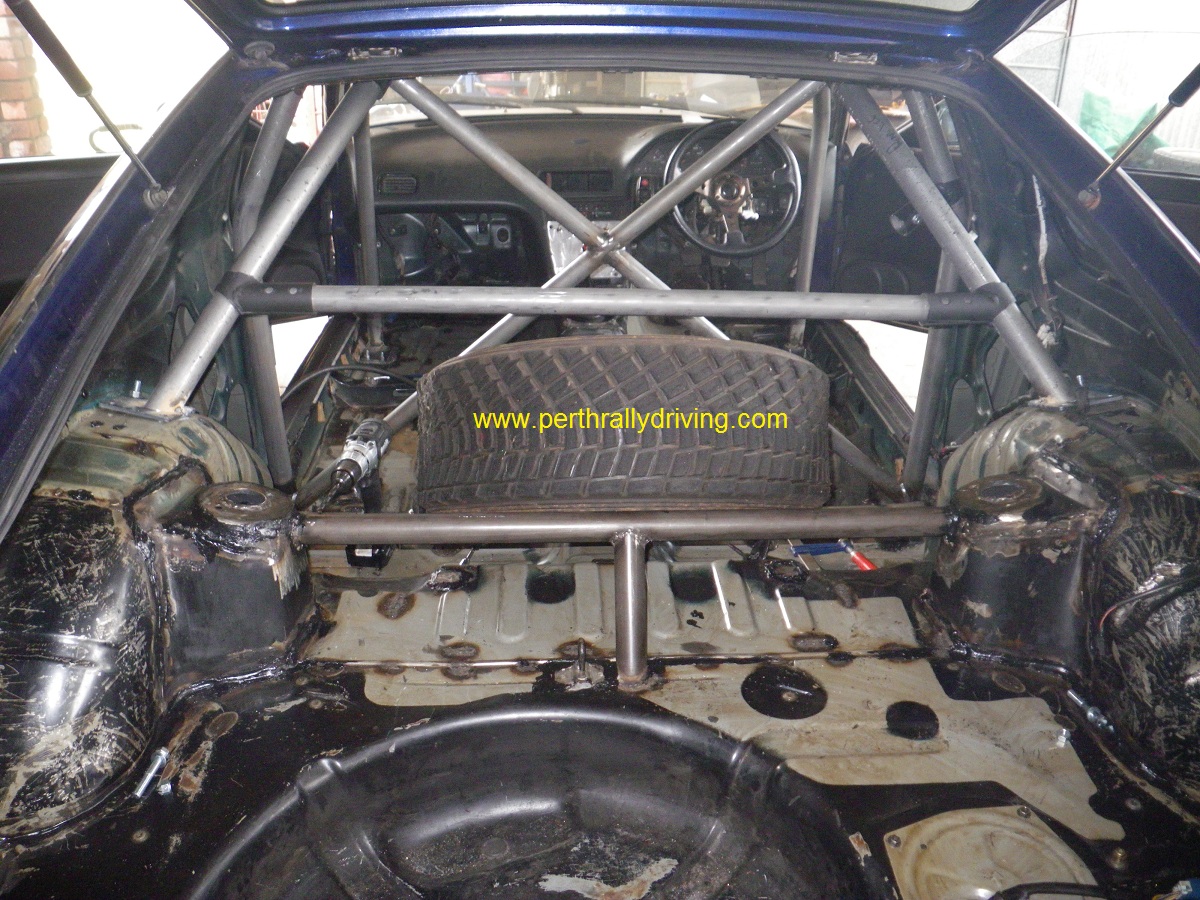
This particular cage kit requires the installer to cut the rear legs to length themselves and then weld the mounting plates to suit. This takes a bit of time on each side to get the correct lengths and angles sorted before bolting and tacking the plates. With the rear legs in position, we also cut down the optional harness bar to the correct length between the rear legs and slid the clamps into rough position. We checked the spare wheel mount for clearance to the harness bar. Everything fits as its supposed to.
The side intrusion bars will also need to be cut to length in the same fashion as the harness bar. The intrusion bars will be fitted during final cage install.
The remaining mounting holes around the car were all marked for drilling. This is required as some of the holes cannot be drilled with the cage in place due to access to get a drill in.
We then dismantled the cage and pulled it out of the car. It didn’t take long to remove the cage as we only had two bolts in each pad mount and none of the cage clamps have yet been drilled or bolted. The cage will be painted separately to the interior which will provide a better finish.
 With the cage out, the trusty Makita cordless drill was enlisted to drill the remaining holes. First all the holes were pilot drilled before opening them up to the correct size using a 10mm drill bit.
So what are our thoughts on the cage kit? Well this is the first time we have used a bolt in cage kit from this particular manufacturer. We have previously used weld in kits from the same manufacturer which are quite good. The weld in kit does require a lot more work as the bars are all supplied long, need to be cut to correct length and notched before welding.
As far as the bolt in kit goes, well it’s not really a true bolt in as such. The incorrect front legs aside, if you didn’t have access to the right equipment and a good welder (plus the necessary skills) it would be easy to make a mess or run into trouble. Also you have to drill all of the clamp bolt holes through the tubes and the cage kit is delivered un-painted.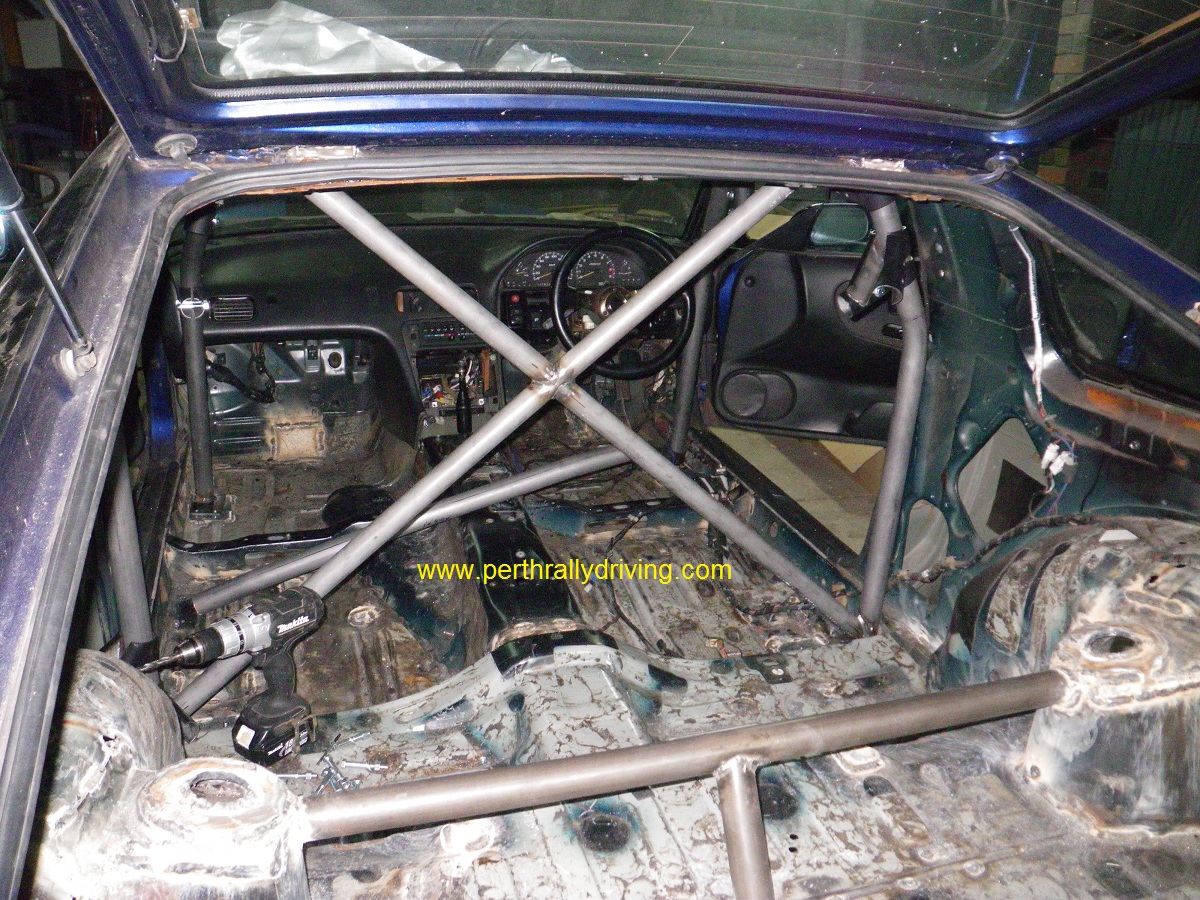
Other bolt in kits from other manufacturers we have installed in different cars have had a different clamp style, have been delivered painted/powder coated and all you need to install them is a drill for the floor mounting plates and some spanners to tighten the bolts.
The cage we have used for the 180SX is CAMS compliant and for us that is the most important part. The tip here is to ask questions before purchasing a roll cage to ensure that it meets your requirements, skill level and tools. We knew when we ordered the cage that some cutting and welding would be required and it was no problem for us.
More build articles here
Next post will cover the interior and items that go with it such as brake bias and hydraulic handbrake.
