Nissan 180SX Gravel Rally Car- Rear subframe (cradle) works
With all the seam welding around the rear sub frame mounting completed under the car, attention was focussed on the rear cradle and diff.
Before the car was pulled apart, we’d already identified the rear bushes all needed attention.
With the cradle out of the car and on the ground, it was apparent how bad the factory rubber bushes were. It wasn’t surprising really. The car is 24 years old 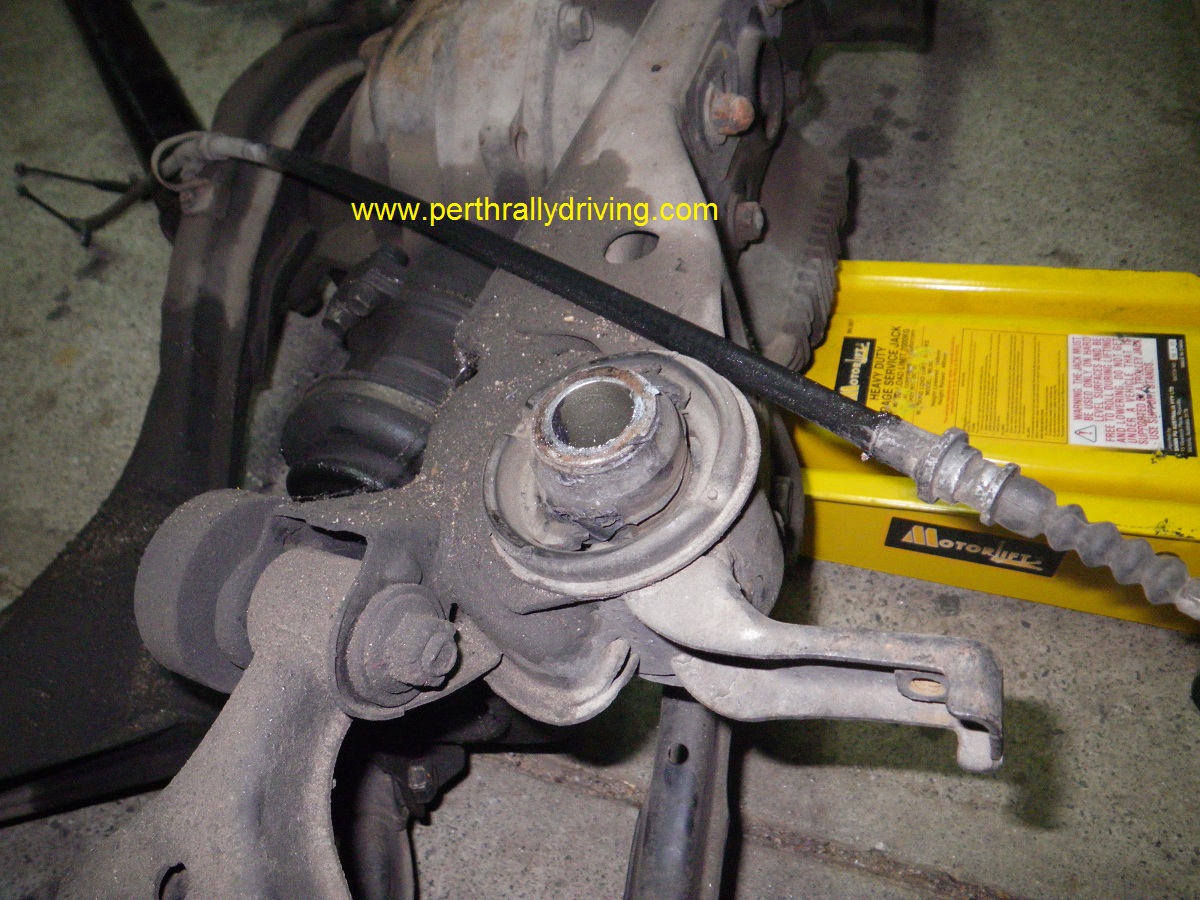 and has spent some time drifting. At one point someone had fitted a set of urethane “pineapple slices” to the rear cradle mounts, this had done little for the completely flogged out sub frame mounting bushes.
Being mindful of the budget, a complete re-bush in Nolathane was going to use up a chunk of cash we could best devote to other areas of the car. At that point we had some luck. The S13 shell we’d originally bought to build as a rally car was found to be harbouring a good complete rear cradle with decent bushes.
Some quick work with the Makita Cordless Impact Wrench and the trolley jack had both rear cradles on the ground side by side.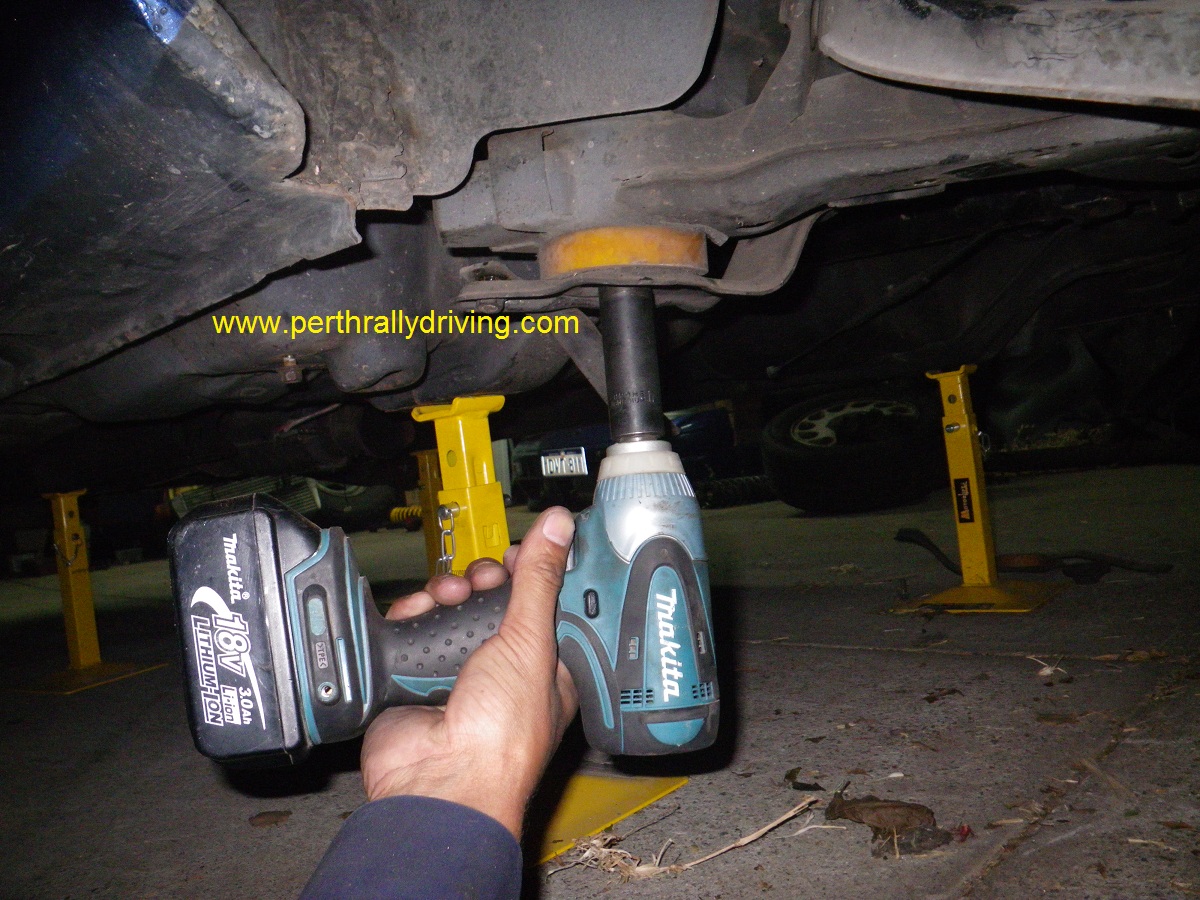
To start with, we had intended to do a complete swap of the rear cradles and cannibalise the old cradle for spare parts to load into the service trailer for rallies. We soon realised the diffs and drive shafts in the cradles were different. The cradle out of the 180SX has a Type X diff in it. The diffs have different length noses (meaning different length tail shafts) and the Type X diff uses 6 bolt drive shafts instead of the 5 bolt units found in the 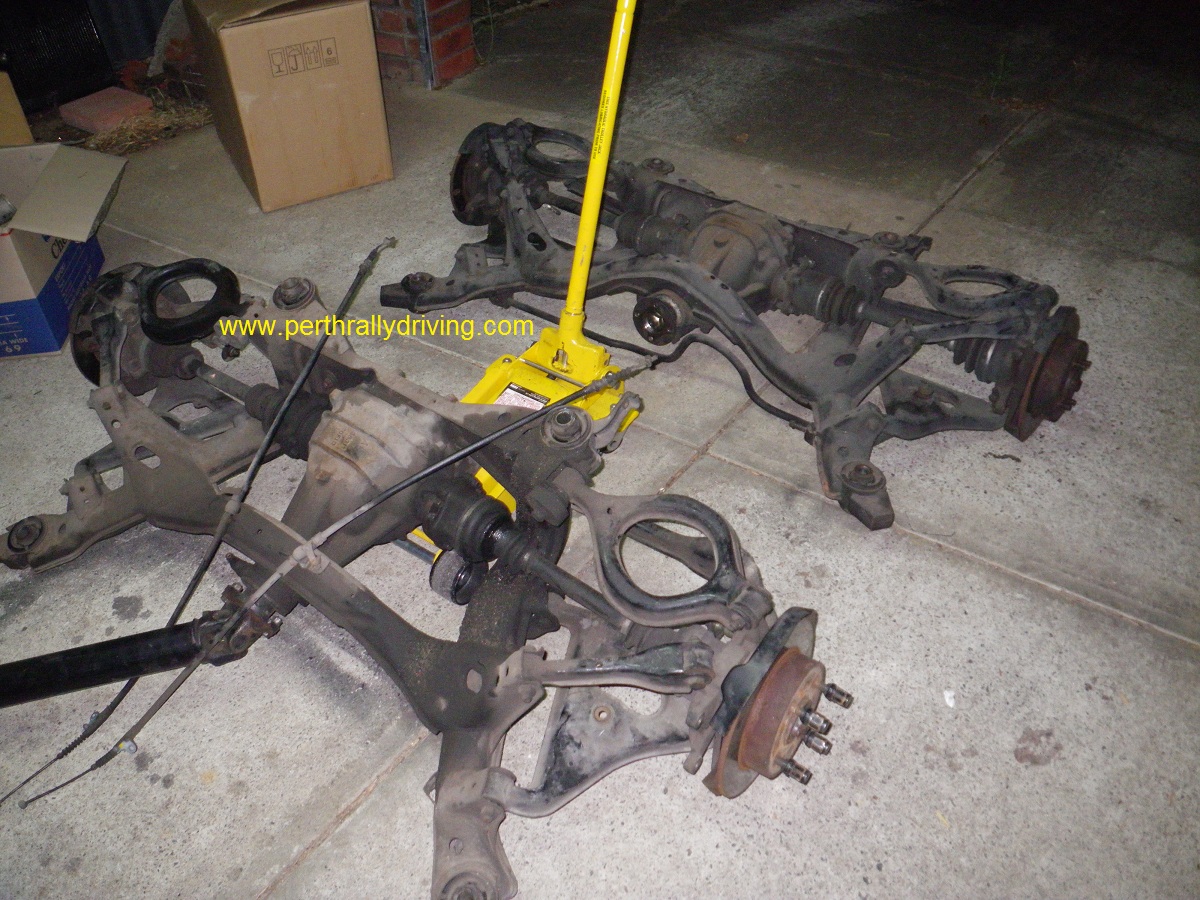 standard S13 rear end. It was another minor win finding a better diff in the 180SX.
The Type X diff was removed from the old cradle along with the shafts and hubs. Whilst apart, the rear ball joints were inspected and the left hand CV boots were replaced (split when we got the car). The rear cover was also pulled off the diff for a look inside. Initially we had thought that the 180SX diff had been welded up as it was very tight. We drained out fairly clean oil, found nothing suspicious on the magnetic drain plug and clean looking internals. Instead of a welded up open centre diff, we found a mechanical LSD. Having a chat to people in the know, the diff is a 2 way mechanical, probably a Nismo LSD. Whilst the diff was apart, the crown wheel teeth were counted to determine the ratio. Most S13’s have a 4.1:1 diff, a Google search revealed that this diff is a 4.36:1, so another win with a slightly lower ratio to help with acceleration.
Everything was cleaned up, a new bead of sealant applied and the diff was reassembled. The Type X diff, shafts and hubs were then mated up to the good rear cradle and everything was bolted back together. Like Subaru have done with the WRX/Legacy platform, Nissan have done with the S13 in terms of working on the cars. So far everything has been relatively straight forward to work on with a logical set of steps to remove and re-assemble parts. I will say this however. Regardless of Nissan, Subaru or any other brand, I am very glad of a Cordless Impact Wrench! With the amount of bolts to remove and re-install, the time taken is greatly reduced as well as the effort to loosen some well tensioned (bloody tight) nuts and bolts. You can read full reviews on the 18V Cordless tools we use here: www.productworx.com
Before the rear cradle was put back into the car, we opted to fit a set of rear sub frame locks. Like most manufacturers, Nissan use pressed in rubber bushes 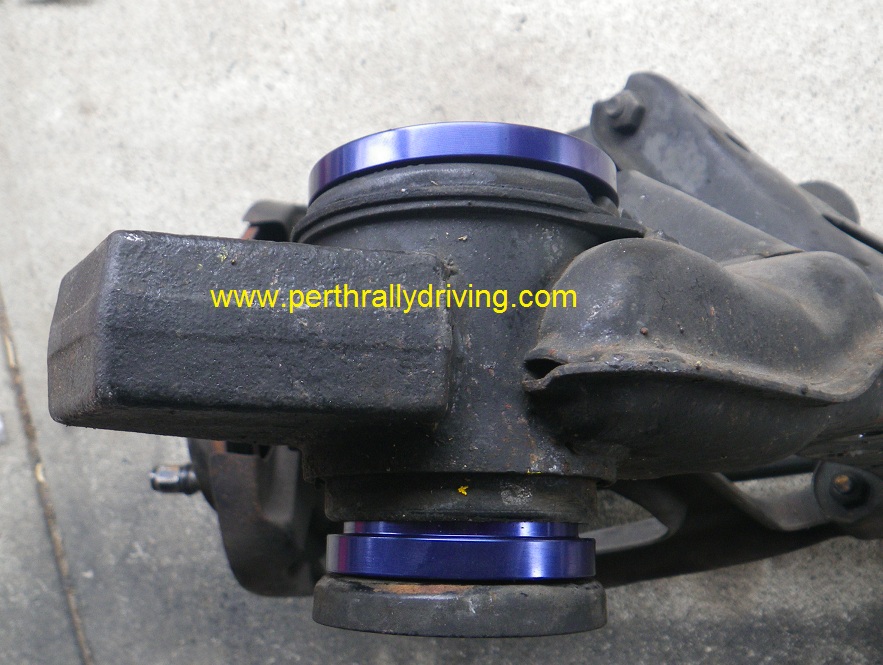 with steel inserts to mount the rear sub frame. The rubber bush acts as a damper to aid with NVH. Whilst the rubber bushes may be fine for everyday road use, in competition use, you want the suspension to perform precisely without additional uncontrolled movement. The photos of the bushes in the old cradle speak for themselves.
The machined aluminium sub frame locks come in a kit of 8 (one upper and one lower for each mounting point). They are designed to be installed without dropping the rear sub frame out, however as the frame was already on the ground, it was no drama for us. The locks are specifically shaped to match the contours of the factory bushes and pull up tight against the steel insert through the centre of the bushes. Once bolted back into the car, the rear sub frame is now effectively solid mounted. This ensures no more 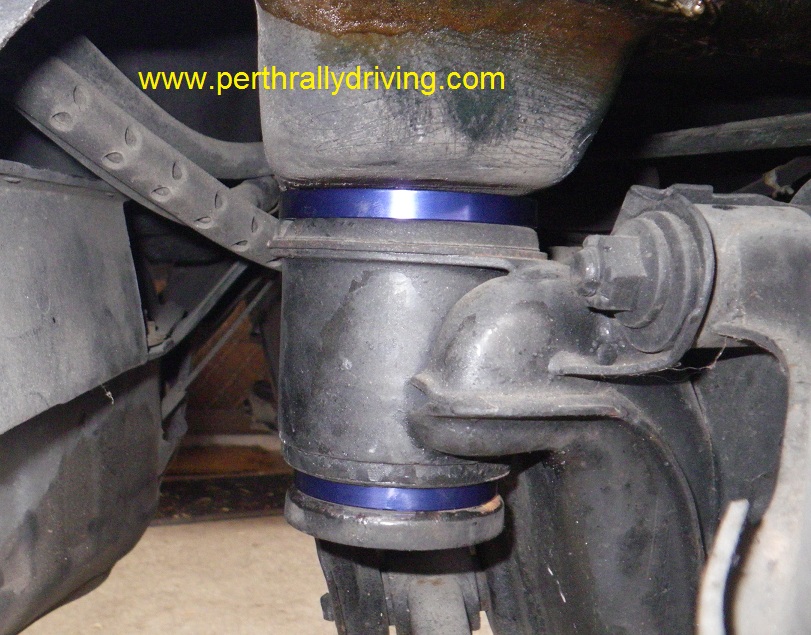 flogged out mounting bushes, better suspension geometry and increased rigidity. A cheap performance enhancement.
The last check was to inspect the one piece tail shaft. Both UJ’s were found to be fine and the tail shaft will go back in once the engine mounts are replaced and the gearbox oil is drained.
In the mean time, interior tar removal and seam welding continues whilst we wait on the roll cage to arrive.
Next post will focus on other mechanicals like engine mount replacement, fitting thermo fans and front suspension work.
We are still in need of all the standard intercooler hoses and pipe work. If anyone has these items laying around in their shed, please contact us, we’ll be happy to take them off your hands.
More build articles here
